Key Takeaways
- The Guide to Photo Scanning discusses how to digitize printed photos and preserve family memories.
- Start by gathering all prints and deciding on key settings like resolution and file format.
- Choose between DIY scanning or professional services like ScanMyPhotos for convenience and efficiency.
- Organize and back up scanned photos properly to safeguard against loss; consider collaborative storytelling with family.
- Explore advanced projects, such as scanning slides and videos, to further preserve family history.
Reported by ScanMyPhotos: Guide to Photo Scanning

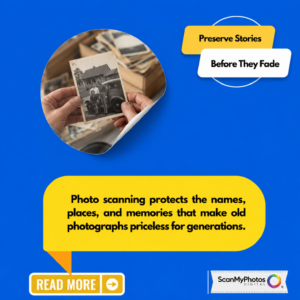
Imagine this. On the left, a shoebox of printed photographs spills open. On the right, the same memories are glowing on a phone screen, instantly shareable with family around the world.
While old photos live everywhere, from attic boxes to fading albums, the process of bringing them into the digital age requires more than just technology. It’s about saving family history, unlocking hidden stories, and ensuring nothing is lost to time, disasters, or decay. With 35 years of experience and over one billion photos digitized, ScanMyPhotos.com has created this roadmap for anyone ready to begin their journey.
Quick Start: Your First Week in Photo Scanning
- Build a Memory Basecamp (gather all your prints in one place)
- Learn the Core Choices (DPI, file formats, color vs. black & white)
- Keep It Simple: Start small, build momentum
- Mindset and Goals
- Understand why digitizing is urgent
- Identify what matters most to your family
Gear and Tools
- Flatbed DIY scanner vs. bulk photo scanning services.
- DIY setups vs. professional services
- The Process Step-by-Step
- Sorting, prepping, and cleaning photos
- Scanning settings made simple
- Saving, backing up, and sharing files
- Preservation & Storytelling
- Organizing digital albums
- Adding captions and context
- Inviting family to contribute memories
- Advanced Projects
- Slides, negatives, VHS, and large archives
- Metadata, AI restoration, and tagging tools
Quick Start: Your First Week in Photo Scanning
Day 1 Mission: Build Your Memory Basecamp
Just like bird photographers start with their backyard, you begin by gathering your prints. Collect albums, envelopes, shoeboxes—everything. Please put them in one clean, dry, safe space. This step alone transforms overwhelming clutter into a manageable project.
This Week’s Mission: Master the Big Three Choices
Forget the tech overload. Focus only on three decisions first:
- Resolution (DPI): 300 DPI is good, 600 DPI is archival.
- File Format: JPEG for everyday use, TIFF for long-term preservation.
- Organization: Decide if you’ll name by year, event, or person.
- Essential Tools (No More, No Less)
Don’t overthink it. To begin, you only need: - A photo scanner or a professional service like ScanMyPhotos.com
- A microfiber cloth (photos should be clean before scanning)
- An external hard drive or cloud account for safe storage
Mindset and Goals
The truth is: 96% of printed photos are never looked at again after being developed. They sit unseen, vulnerable to fire, floods, or fading. Your goal isn’t just “digitizing”—it’s rescuing stories, faces, and voices before they disappear. Ask yourself: What photos would I miss the most if they were to vanish tomorrow? Who in my family has albums I’ve never seen?
Guide to Photo Scanning
How can these digital versions spark new connections when shared? This mindset turns photo scanning from a chore into a legacy project. Gear and Tools for Beginners.
DIY Options
Flatbed Scanners: Affordable, but slow. Suitable for a few photos at a time. Keep in mind you are paying the cost of the equipment, often hundreds of dollars, before the first picture is scanned. Think of it like you can cook a meal at home, or have professional chefs serve you at a restaurant.
All-in-One Printers: Suitable for documents, but less ideal for high-quality images. Bulk Feed Scanners: Faster, but risk bending or damaging delicate prints.
Professional Services: For large projects, services like ScanMyPhotos.com can scan hundreds of thousands of prints in a single day. Their “fill-the-box” photo scanning service allows you to mail a prepaid box of photos, which are then scanned and securely uploaded to your email inbox, or returned as 8GB flash drives.
Pro Tip: Include an Apple AirTag or Tile in your box. ScanMyPhotos recommends this for peace of mind — you can track your memories every step of the way.
Step-by-Step Scanning Process
- Sort first
- Pull duplicates, toss blurry shots, keep the meaningful ones.
- Organize by event, decade, or person.
- Prep Your Photos. Follow these guidelines for preparing your photos for scanning.
- Remove from albums and sleeves carefully.
- Flatten curled prints under a book for a day if needed.
- Wipe with a microfiber cloth to remove particles — 10 tips for cleaning your photographs.
Set the Right Settings
Resolution: 600 DPI for archival. Color: Scan in color—even black-and-white prints capture more detail. File Type: JPEG for sharing, TIFF for preservation.
Back Up Immediately
Save in at least two places: an external hard drive and a cloud account. Share with a trusted family member for redundancy. About 8 years ago, a ScanMyPhotos customer lost everything when a hurricane destroyed her home and the only flash drive holding her digitized photos. The painful lesson is that one copy is never enough—technology can fail and disasters happen. The best protection is to create multiple backups, keep at least one copy off-site, and always store a version in the cloud. Your photos aren’t just files; they’re your family’s history, and safeguarding them ensures those stories live on.
Preservation & Storytelling
Digitizing is only the start. The magic happens when photos become stories again.
- Organize digital albums: By decade, event, or person.
- Add Captions: Who’s in the photo, where it was taken, what was happening.
- Family Collaboration: Share albums online so siblings and relatives can add their memories.
Example: One ScanMyPhotos customer digitized her wedding photos, then invited her grown children to write captions about what the day meant to them. The result wasn’t just digital photos, but a living family history.
Advanced Projects
Once you’re comfortable with prints, expand:
- Slides & Negatives: Preserve entire archives with professional-grade scanning.
- VHS & Home Movies: Convert your videos before the tapes and film fade away.
- AI Tools: Utilize restoration software to restore faded colors or identify faces.
Case Study: ScanMyPhotos digitized 347,000 negatives for the Cayman Islands, ensuring cultural history was preserved for generations.
Final Thoughts
Every expert archivist started as a beginner with one photo. The key isn’t speed — it’s starting today. Each picture is a heartbeat, a time machine. Once scanned, your family’s memories become indestructible and instantly shareable. As chief photo archivist at ScanMYPhotos, Mitch Goldstone has shareds: “That last photo of me with my dad at Disneyland inspired ScanMyPhotos. Don’t wait. Start with one picture and you’ll unlock your family’s story.”
Photo Scanning FAQs
Q: What’s the best resolution to scan at? A: 300 DPI is fine for sharing online, but 600 DPI is best for archival preservation.
Q: Should I scan in color even if the photo is black and white? A: Yes, scanning in color captures subtle tones and details that black-and-white mode misses.
Q: How should I back up my scanned photos? A: Always use two methods, like an external hard drive plus a cloud service. Share access with family to protect against loss.