Key Takeaways
- The ‘Guide to digitizing photos’ explains how to preserve family memories through digitization.
- It discusses the importance of digitizing old photos to prevent loss from disasters and fading.
- Readers can choose between DIY methods like flatbed scanners and apps, or professional services for bulk scanning.
- The article offers tips for organizing digital photos, including the 3-2-1 backup rule and adding metadata.
- It emphasizes that digitizing photos keeps family stories alive and encourages immediate action.
Guide to Digitizing Old Photos
 Your family’s story is hiding in boxes, albums, and shoeboxes. This guide walks you through the step-by-step process of digitizing old photos, explains why it matters, and outlines the tools that make it simple.
Why Digitizing Old Photos Matters
Every photo is a time machine. It holds a heartbeat, a smile, or a family milestone that may never be repeated. Yet research shows that 96% of printed photos are never looked at again after development. They sit in albums, boxes, and storage bins until they fade… or worse, disappear in a flood or fire. Digitizing your photos isn’t just a project. It’s a rescue mission for your family’s history. Before you begin, first read this very emotional account of why a USA Today tech columnist digitized her family photo history.
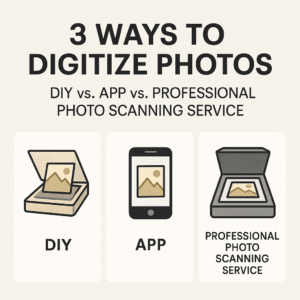
Choosing the Best Way to Digitize
There’s no one-size-fits-all. It depends on your time, budget, and the number of images you need converted.
DIY Scanners
Flatbed scanners (such as Epson or Canon) produce good results, but they’re slow. They are also costly, as you’re out hundreds of dollars before you can scan your first picture. Scanning even 100 photos could take all weekend.
Smartphone Apps
Google PhotoScan and similar apps are quick, but the lower resolution means they’re fine for social media — not best for archiving. Many come with hefty monthly fees, and if you stop paying, you could lose all the content. Who owns your images? Photo scanning services like ScanMyPhotos understand that these are your photos, always unlocked and easily copied.
Professional Photo Digitizing Services
Professional services like ScanMyPhotos.com can scan thousands of your photos in a single day. Many options are available, including same-day scanning, instant uploads, and secure shipping with GPS tracking for added peace of mind.
FAQ: What Resolution Do You Need for scanning photographs? (300 vs. 600 DPI). 300 DPI is suitable for everyday sharing and prints up to 5×7 inches. 600 DPI captures fine details for enlargements, restorations, or archiving. Pro tip: If in doubt, always go higher.
Preparing Your Photos for Digitizing
- Remove photos from albums or frames if possible.
- Wipe gently with a microfiber cloth.
- Sort into groups (by event, year, or family member).
- Label envelopes or boxes for future digital organization.
Step-by-Step: How to Scan at Home
- Clean your scanner glass.
- Place the photo face down.
- Choose 300–600 DPI.
- Save as JPEG for sharing, TIFF for archiving.
- Rename files clearly (ex, 1987_Dad_Birthday.jpg).
When to Choose a Professional Service
Scanning a dozen photos? DIY works. But if you have hundreds — or thousands — you’ll save time and money with a professional service. Look for:
- Bulk pricing discounts.
- Fast turnaround (thousands in a day).
- Additional options such as color correction, backup discs, or cloud delivery.
- Added security—many customers even use an Apple AirTag in their package.
- Organizing Your Digital Photo Collection
Digitizing is Step One. Organizing Makes Them Usable:
- Create folders by year or event.
- Stick to consistent file names.
- Use tools like Google Photos, Apple Photos, or Lightroom to tag and search.
- Backing Up Your Digital Files
Follow the 3-2-1 Rule:
- 3 copies of your files.
- Stored in 2 formats (cloud + external drive).
- 1 copy offsite or cloud-only.
- Cloud services such as Google Drive, iCloud, and Dropbox are easy and secure options.
Adding Metadata and AI Tools
Metadata refers to the process of adding dates, names, and locations to each photo. AI tools can even auto-tag faces and organize albums, making it easier to search later.
Common Mistakes to Avoid
- Scanning at too low a resolution.
- Forgetting to back up files.
- Relying on auto color filters that distort originals.
- Waiting too long—photos fade faster than you think.
FAQ: Digitizing Old Photos
Q: What’s the best way to digitize hundreds of photos? A: Use a professional service that handles bulk scanning quickly and safely.
Q: Should I scan at 300 or 600 DPI? A: 300 DPI works for everyday use. Use 600 DPI if you may enlarge or restore.
Q: Can I use my phone? A: Yes, but phone scans are often lower quality. For long-term preservation, scanners or pro services are better.
Closing Thought
Digitizing your photos is more than technology. It’s about keeping your family’s story alive, safe, and shareable. Whether you scan a few at home or send thousands to a trusted service, don’t wait. The best time to rescue your photos is today. Waiting to digitize your photos? Now’s the time. Start here ➡️ ScanMyPhotos.
Why 96% of Photos Are Never Seen Again
AirTags and Photo Shipping Safety
Digitize photos, scan old photos, convert printed photos to digital, best photo scanning service. Learn step-by-step how to preserve old memories, choose the right DPI, and store them safely. The guide includes DIY vs. professional scanning, backup rules, and tips for organizing digital collections. Optimize with metadata and AI tools. Preserve family memories forever by digitizing photos today with trusted professional scanning.