As you prepare to have ScanMyPhotos professionally digitize your photographs, with our fill-the-box service, we prepared this easy guide to help simplify how to digitize your pictures.
 Discover the Easy Way to Digitize Your Pictures with ScanMyPhotos.
Introduction:
Digitizing your printed photos is a great way to preserve and share your cherished memories. ScanMyPhotos pioneered the convenient, affordable, and reliable bulk photo scanning service, allowing you to convert your physical photos into a digital format. This guide will walk you through the step-by-step process of digitizing your pictures using our professional archival services’ prepaid photo scanning box.
Step 1: Visit the ScanMyPhotos.com Website
Go to ScanMyPhotos and navigate to the prepaid photo scanning box page. You can find this page by clicking the “Prepaid Photo Scanning Box” tab in the website’s main menu.
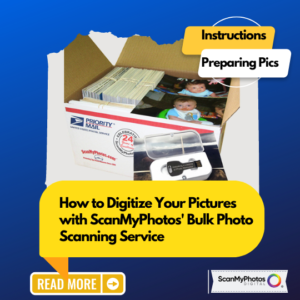
Instructions: How to prepare your photos for the prepaid photo scanning box.
Step 2: Select Your Scanning Options
On the prepaid photo scanning box page, you will find different options for scanning services. Choose the one that best fits your needs. ScanMyPhotos offers various packages, including low-level social media (72 dpi) resolution through professional (600 dpi) resolution. When selecting, consider factors such as our XPress ScanFast same-day service, photo index albums, photo enhancement to fix your pictures, rotation, 8GB flash drives, and other popular features.
Step 3: Place an Order
Once you’ve chosen the scanning package, click the “Order Now” button to proceed. You will be directed to a page where you can review your order details. Double-check the selected options, quantity, and additional services you may have included. If everything looks good, click on the “Add to Cart” button to proceed to the checkout. When you spend over $695, you also receive an instant $30 cash-back savings.
Step 4: Provide Shipping Information
Enter your shipping information, including your name, address, and contact details. ScanMyPhotos will use this information to send you the prepaid photo scanning box and to return your digitized photos once the scanning process is complete (if you select that option). Ensure that all the details are accurate and complete before moving forward.
Step 5: Make a Secured Payment
Choose your preferred payment method and follow the on-screen instructions to complete the payment. ScanMyPhotos accepts popular credit card payment options. Once your payment is successfully processed, you will receive an order confirmation via email.
Step 6: Receive the Prepaid Photo Scanning Box
Within 1-2 days, we will mail you the prepaid photo scanning box to your provided address. Keep an eye on your email for tracking information. The package will include a prepaid shipping label for your convenience.
Step 7: Prepare and Pack Your Photos
Follow these instructions to ensure your photos are correctly prepared and packed for scanning. Arrange your pictures in batches; ensure not to include any copyrighted materials, sticky notes, or paper clips, and place them securely in the box to prevent damage during transit.
How to prepare your photos for the prepaid photo scanning box:
- Print Instructions
- Accepted/Not Accepted for Scanning:
- Only photo scanning is accepted; no negatives, slides, or other media.
- Photos must be between 3″x3″ and 8″x10″ in size.
- No newspaper clippings, odd-shaped photos, or laminated images.
- Photos must be square or rectangular in shape.
- Photos should be bendable/curlable and not thicker than a modern Polaroid picture.
- Copyrighted photos require a copyright release from the photographer.
- Any photo that doesn’t meet the requirements will be returned unscanned.
- Preparing your Photos for Scanning:
- Remove photos from albums, envelopes, etc.
- Ensure no staples, paper clips, or sticky materials are attached.
- Group photos by size within the box.
- Keep photos right side up and facing the same direction.
- Photos should be lying horizontally.
- Fan through photos to check for dust or impediments.
- Use a lint-free cloth to remove dust.
- Avoid substances on the photos, as they will be scanned as well.
- Photos should not be glued or taped to anything else.
- Curled photos may result in hazy or out-of-focus scans.
- Scan in Order Service Explained:
- Order the “Scan in Order” service for specific scanning order.
- Include index cards for each photo bundle with handwritten notes.
- Do not use Post-it notes or scraps of paper.
- Use numbers in the top right corner of index cards for scanning order.
- Packing the Box:
- Fill the box well and secure it with tape.
- Use packing materials to prevent shifting.
- Do not use popcorn for packing.
- Use rubber bands to group photos in batches.
- Legal Stuff:
- No refunds once the empty box is shipped.
- Return the prepaid box within six months of placing the order.
- Multiple boxes can be sent separately.
- Failure to follow guidelines incurs a handling fee and return postage charges.
- Acceptable Packaging: Similar-sized photos laid horizontally, tight packaging to prevent shifting.
- Unacceptable Packaging: Photos are not organized by size, facing different directions, and are not secured to avoid shifting.
- How to Scan Your Photos: Organize photos by size, use rubber bands, and fill empty spaces to prevent shifting.
- Photos Scanning Service: Organized by size, and packaged securely to prevent shifting.
- Bent Photo: Severely curled photos cannot be scanned; a slight curl may result in a hazy scan with a purple haze over the image.
Step 8: Mail Your Photos
Affix the prepaid shipping label to the outside of the box. Take the box to your nearest shipping carrier or schedule a pickup, depending on the shipping instructions provided by ScanMyPhotos.com. Keep any tracking information or receipts provided by the carrier for reference.
Step 9: Wait for Scanning and Digital Delivery
ScanMyPhotos begin the scanning process as we photos. The time it takes to complete the scanning will depend on the package you selected and the number of photos you sent. The standard completion time is typically within a few weeks unless you choose ScanFast. Once the scanning is finished, if you select to have your digital files uploaded to your email inbox, you will receive a notification to open and view your pictures.
Step 10: Most Importantly, Enjoy Your Digital Photos
Once you receive the notification, follow the instructions to access and download your digitized photos. You can now enjoy your precious memories in a digital format, share them with friends and family, and create backups for safekeeping. For DVD data disks and 8GB flash drives, insert those into your computer to view all.
We hope you enjoyed this tutorial for preparing your pictures. For questions, click here; our friendly concierge staff is eager to work with you on this project.
Meta Tag Description: Learn how to digitize your printed photos with ScanMyPhotos.com’s bulk photo scanning service. Follow our step-by-step guide to easily convert physical photos into digital format and preserve cherished memories.
Keywords: photo scanning service, digitize pictures, bulk photo scanning, convert physical photos, ScanMyPhotos.com, prepaid photo scanning box, scanning options, shipping information, payment methods, digital delivery.
Headlines:
“Preserve Your Photo Memories with ScanMyPhotos.com’s Convenient Bulk Photo Scanning Service”
“Discover the Easy Way to Digitize Your Pictures with ScanMyPhotos”
“Convert Your Physical Photos into Digital Format with ScanMyPhotos’ Prepaid Photo Scanning Box”
“Never Lose Your Precious Memories: Learn How to Digitize Your Pictures Today”
“Share and Enjoy Your Digital Photos with ScanMyPhotos.com’s Bulk Photo Scanning Service”
“Get Your Printed Photos Digitized Hassle-Free with ScanMyPhotos.com”
“Step-by-Step Guide: How to Digitize Your Pictures Using ScanMyPhotos’ Photo Scanning Service”
“Preserving Memories Made Easy: ScanMyPhotos.com’s Bulk Photo Scanning Service”
“Turn Your Old Photos into Digital Treasures with ScanMyPhotos’ Bulk Scanning Service”